The application creation process in Cloudpermit is user-friendly and guided. This article will walk you through the steps of creating a draft building permit application. Let's get started!
Step 1: Accessing the Application Creation Process
- Log in to your Cloudpermit account and access your dashboard.
- Click NEW APPLICATION to begin the process.

- Select your municipality from the list of options.

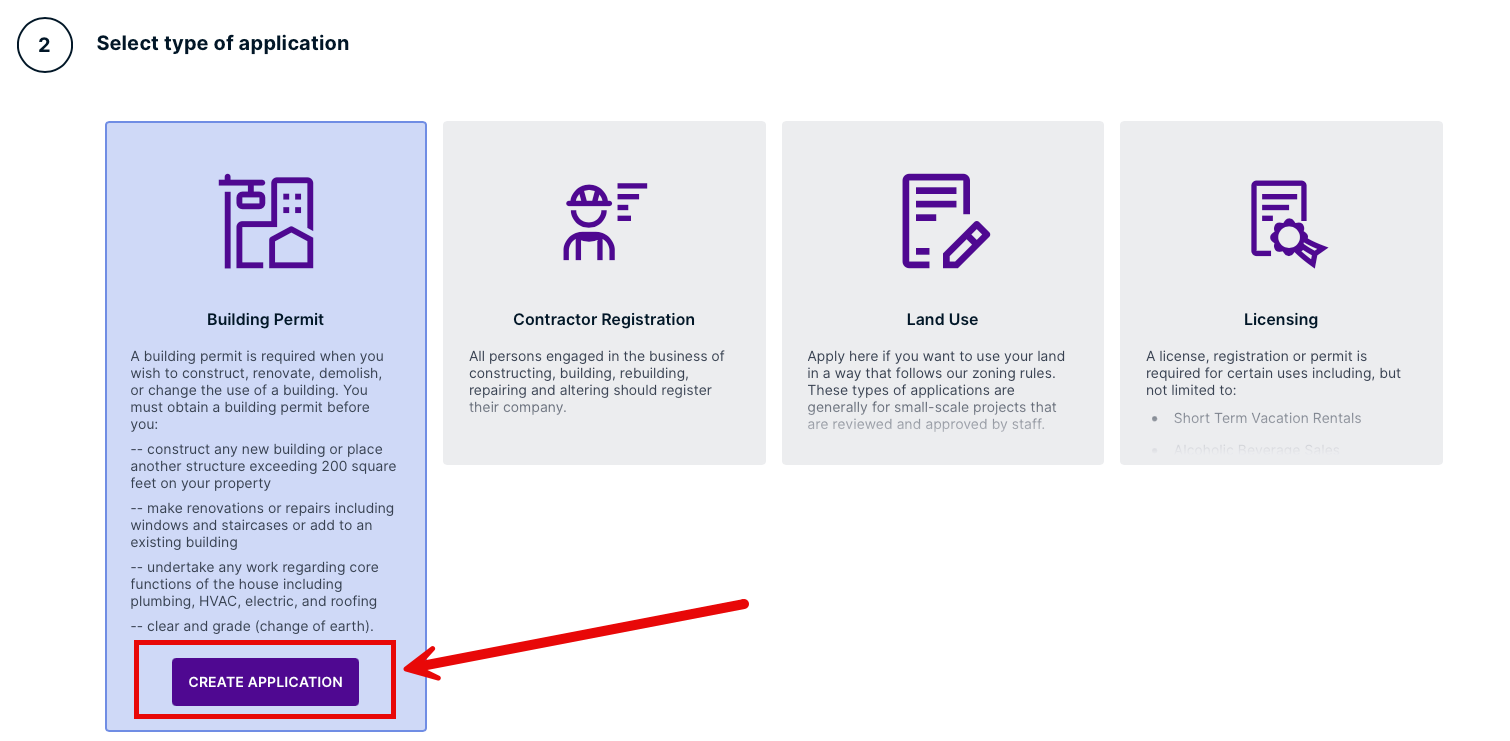
- Choose the type of application via the Product tiles (e.g. Building Permit), then click CREATE APPLICATION.
Step 2: Category Selection
- Select the Category, then the Work type and Work target.

- Click NEXT to continue.

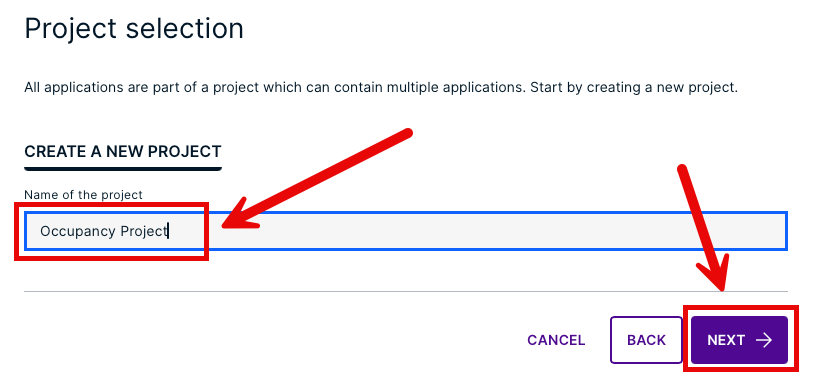
Step 3: Project Selection
- Enter the Name of the project, then click NEXT.
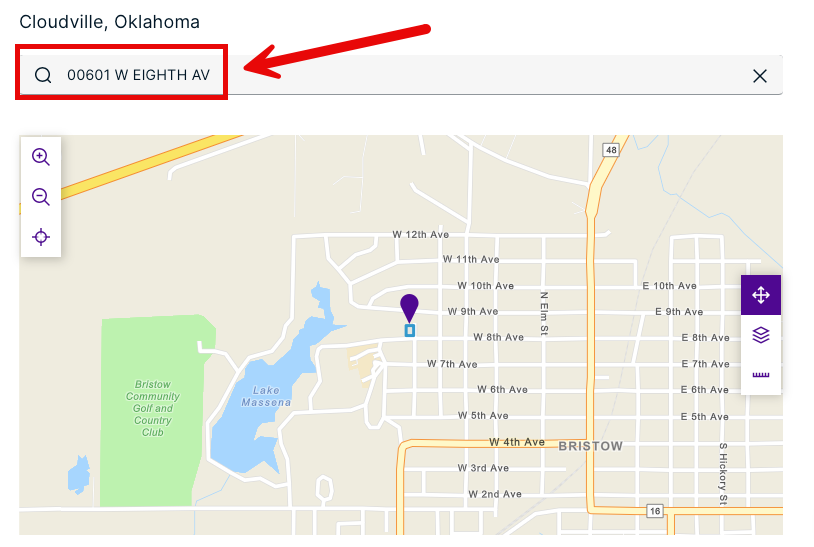
Step 4: Locating the Property
- In the Location for the application workspace, specify the property's location based on your province (state) and municipality. Then, click NEXT.
Step 5: Review Summary
- Review your selected application options.

- To review or change the information entered, click BACK.

- If you are satisfied with your information, click FINISH & CREATE.

Step 6: Application Status
- Your application will remain in the Draft step of your application workspace until you submit it.

Congratulations! You have successfully created a draft building permit application in Cloudpermit. If you encounter any issues or have further questions, please reach out to our support team for assistance.
Was this article helpful?
That’s Great!
Thank you for your feedback
Sorry! We couldn't be helpful
Thank you for your feedback
Feedback sent
We appreciate your effort and will try to fix the article