Initiating a Draft License Application
To start your application, access the "Create a New Application" wizard from your dashboard.
- Start a New Application: Navigate and click on "Create New Application.

- Select Location: Choose your state and municipality under the "Select city" section.
- Application Type: Pick "Licensing" as the application type and click "Create Application."

- License Details: In the workspace, select your license type (category), work type, and target, as predefined by your city. The category you choose will determine the available work types and targets.

- License Holder: Choose the individual or business applying for the license from a dropdown menu displaying the account creator and all businesses listed in the account within the Cloudpermit database (note: you can apply for yourself or on behalf of a business). After selecting the Cloudpermit account holder as the applicant, proceed by clicking "Next.

- Location Selection: In the workspace, specify the municipality for your license application by entering an address, PID, or PIN, or by selecting a location on the map. Property details will be displayed for confirmation. Click "Next" to continue.

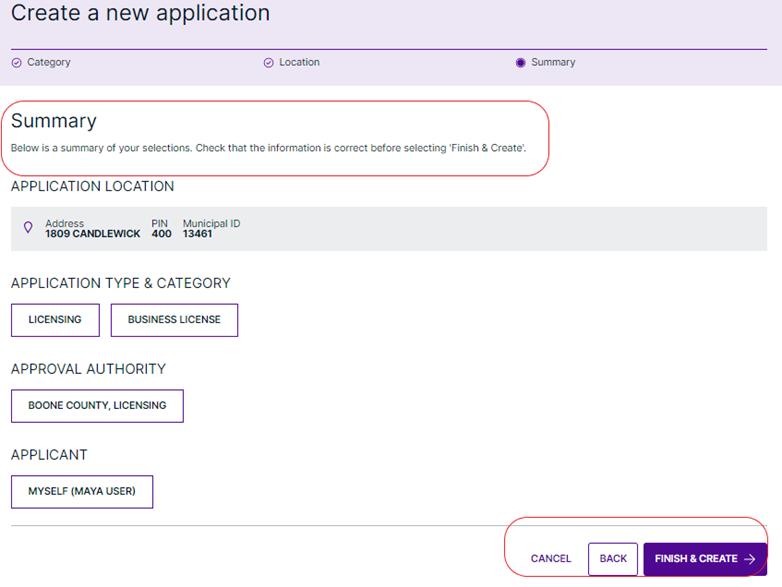
- Review and Create: After reviewing your selections in the "Summary" view, click "Finish & Create" to create your draft application. Use the "Back" button for any corrections, or "Cancel" to discard the draft and return to the dashboard.
- Completing the Application: Once directed to your draft application's workspace, follow the "Required Tasks" progress bar to add/invite party roles, complete application data, sign off on the application, and make license payments. An application is not submitted to your municipality until the application is complete.

Was this article helpful?
That’s Great!
Thank you for your feedback
Sorry! We couldn't be helpful
Thank you for your feedback
Feedback sent
We appreciate your effort and will try to fix the article